Installing solar panels on the roof of your RV means achieving true energy independence and enjoying a more liberating camping experience. A solar system not only reduces reliance on external power sources but also provides a reliable and sustainable power supply while you are in remote areas, far from the grid. This allows you to spend more time outdoors without worrying about finding power outlets.
This guide will provide a comprehensive overview of how to install solar panels on your RV, ensuring you are well-prepared for your next adventure. We will delve into the workings of off-grid systems, offer step-by-step installation instructions, and highlight common mistakes to avoid during the installation process. By mastering this knowledge, you'll be able to fully enjoy the convenience and freedom that solar power brings to your outdoor explorations.
How Off-Grid RV Solar Systems Work
Off-grid RV systems operate fundamentally differently from traditional grid-connected systems, as they do not rely on local utility power supplies. Instead, these systems harness renewable energy sources such as solar, wind, hydro, or biomass to create a self-sufficient power system. This section will focus on the components and functioning of off-grid solar systems.
Overview of System Components
An off-grid solar system typically consists of several core components:
- Solar Panels: Photovoltaic (PV) panels are the heart of the system, capturing sunlight and converting it into direct current (DC) electricity through the photovoltaic effect. High-efficiency solar panels maximize solar absorption and maintain stable performance under various weather conditions.
- Lithium Iron Phosphate Batteries (LiFePO4): Serving as the energy storage solution, lithium batteries store the electricity generated by solar panels during the day for use at night or on cloudy days. These batteries have a higher energy density and longer cycle life, making them ideal for mobile and portable power solutions.
- Balance of System Components: Apart from the solar modules, the balance of system components includes charge controllers, inverters, wiring, fuses, and circuit breakers. These devices ensure the stable operation of the system while providing necessary safety protections.
Operational Workflow
When sunlight strikes the solar panels, electrons in the photovoltaic cells are excited, generating direct current (DC) electricity. This electricity flows through the charge controller to the lithium battery for storage. The charge controller manages the flow of electricity, ensuring the battery does not overcharge or discharge excessively, thereby extending its lifespan.
When power is needed, the inverter converts the stored DC electricity into alternating current (AC), which can power various appliances and devices within the RV. The efficiency of the inverter directly impacts the overall performance of the system, making the selection of a high-efficiency inverter crucial.
Off-grid solar systems not only provide sustainable power support for RVs but also grant users greater freedom and flexibility during outdoor activities. By understanding these components and their operational principles, RV owners can effectively configure and optimize their solar systems to meet personalized energy needs.
Types of Solar Panel Installations on RV Roofs

While it's not strictly necessary to install solar panels on the roof of an RV, doing so can significantly enhance energy collection, especially while driving. Here are several installation options suitable for RVs, each with unique advantages and applicable scenarios.
1. Fixed Installation
Fixed installation systems are designed for rigid solar panels and typically require drilling into the RV roof to install mounting brackets. These brackets provide a stable platform, ensuring that the panels remain securely attached under various driving conditions. Key considerations for this method include:
- Weather-Resistant Materials: Choose durable materials that can withstand the elements, ensuring the brackets maintain stability over time.
- Drainage Design: Ensure the bracket design incorporates good drainage to prevent water accumulation, which can lead to corrosion.
2. Flexible Installation
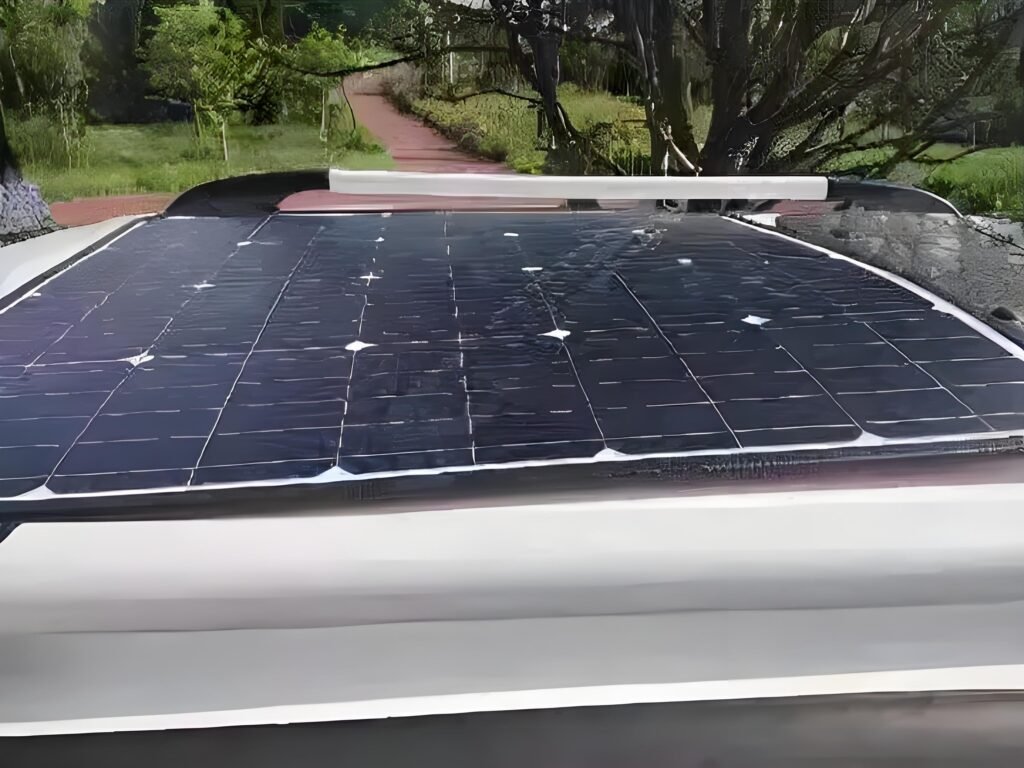
Flexible solar panels can adapt to the shape of the RV, making them suitable for various curved surfaces. The installation process is relatively straightforward, usually involving strong adhesive tape to secure the panels to the roof. While this method is easier to implement, it may still require drilling a single hole to route the cables. Advantages of flexible installation include:
- Lightweight: Compared to rigid panels, flexible solar panels are lighter, making them ideal for applications where reducing weight is essential.
- High Adaptability: They can easily conform to irregular surfaces, making them suitable for different RV models.
3. Tilted Installation
Tilted installation systems allow users to adjust the angle of the solar panels according to sunlight exposure, maximizing solar energy capture. This installation method can utilize adjustable brackets or tilted platforms. When choosing a tilted installation, consider the following factors:
- Optimal Tilt Angle: Determine the best tilt angle based on geographical location and seasonal changes to achieve the best sunlight conditions.
- Structural Stability: Ensure that the mounting system is sturdy enough to withstand wind and other external forces.
Selecting the appropriate installation type is crucial for optimizing the performance of an RV solar system. Each installation method offers unique benefits that cater to different usage needs and conditions. With thoughtful design and professional installation, you can significantly enhance the energy independence of your RV, providing reliable power support for future adventures.
Professional Guide to Installing Solar Panels on RV Roofs
1. Comprehensive Measurement and Layout Design
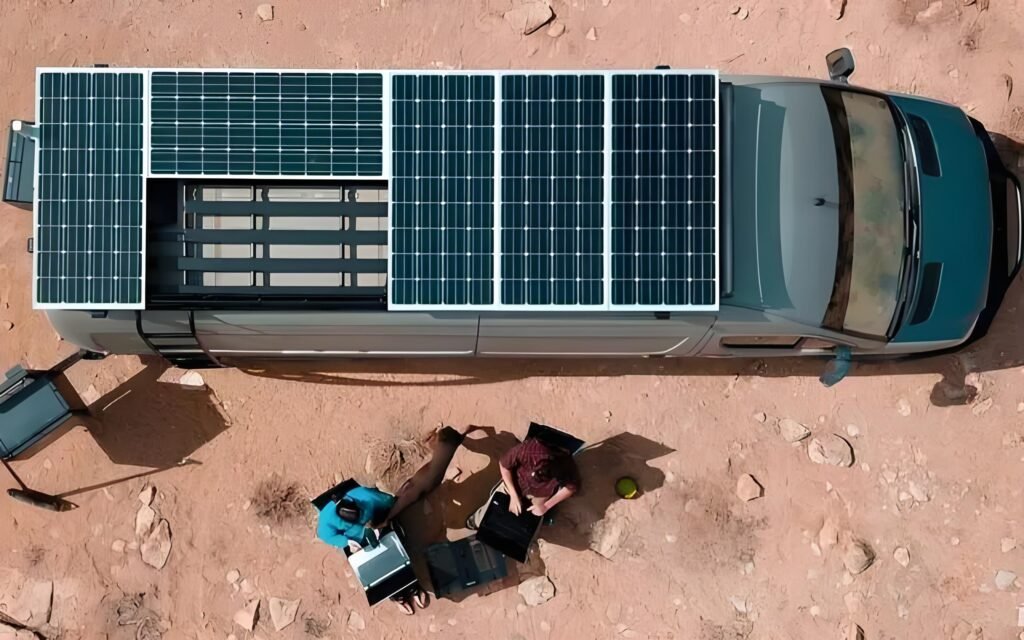
Before starting any installation, accurately measuring the roof of the RV is paramount. Ensure you document the locations of all obstacles, including antennas, vents, and air conditioning units. To design an accurate layout, it’s advisable to use computer-aided design (CAD) software such as Sketchup. This not only allows you to visualize the arrangement of the solar panels but also simulates the impact of different layouts on sunlight exposure.
- Sunlight Analysis: During layout design, use software to model the sunlight conditions at different times of the day to optimize panel placement. Take into account shadow effects to avoid placing panels where they might be obstructed by other devices.
2. Roof Integrity Inspection
Ensuring the integrity of the roof is a critical step before installation. Thoroughly check the EPDM (Ethylene Propylene Diene Monomer) roofing material for cracks, holes, and soft spots. Any defects must be addressed promptly, as they could lead to leaks after the panels are installed.
- Roof Sealing: Before installation, use high-performance roofing sealant to repair any potential damage, ensuring that no water leaks occur during future use.
3. Locating the Roof Trusses
If your RV has roof trusses, identifying their locations is essential for securely mounting the panels. You can use the following methods:
- Acoustic Detection: Tap on the roof with a flat-head screwdriver to listen for hollow and solid sounds to determine where the trusses are.
- Structural Measurement: Truss spacing is typically 16 inches apart, but variations can occur. Measure carefully, considering possible adjustments.
- Internal Observation: Check and measure the trusses from inside the RV through the vent openings for precise positioning.
4. Clearing Roof Obstacles
To ensure maximum sunlight exposure for the solar panels, it is advisable to remove all obstacles from the roof before installation. The ideal layout should only feature solar panels and essential ventilation systems.
- Layout Optimization: Ensure that the arrangement of solar panels utilizes the roof area effectively while avoiding interference from other equipment.
5. Roof Preparation
Before installation, it’s crucial to clean and seal the roof. Make sure the roof surface is dry and free from dust to enhance the adhesive's bonding strength. If any repairs are needed, address them immediately.
- Maintenance and Care: Regularly check the roof's condition, especially after extreme weather events, to ensure it remains in good shape.
6. Professional Installation of Solar Panels
There are various methods for installing solar panels, and selecting the right installation method is crucial:
- Rigid Panel Installation: This requires drilling holes in the roof to secure the brackets, ensuring that a sealant is applied to the base of the brackets to prevent water intrusion.
- Flexible Panel Installation: These can be directly adhered to the roof using high-strength adhesive, eliminating the need for drilling, which is suitable for those who wish to avoid damaging the roof.
During installation, ensure that the panels are level and angled correctly to optimize sunlight capture.
7. Connecting Multiple Solar Panels
When connecting multiple solar panels, choosing the right connection method is vital:
- Series Connection: Connect the positive terminal of the first panel to the negative terminal of the second panel to increase the system voltage. This method is suitable for applications requiring higher voltage outputs.
- Parallel Connection: Connect the positive terminals of each panel together and do the same with the negative terminals. This method increases total current, making it suitable for powering more appliances.
By following this professional guide, you can successfully install solar panels on your RV roof, achieving energy independence. Careful planning and rigorous execution will not only enhance energy efficiency but also extend the lifespan of your equipment, providing greater convenience and comfort for your outdoor adventures.
How to Connect Flexible Solar Panels: A Comprehensive Guide to Parallel and Series Configurations
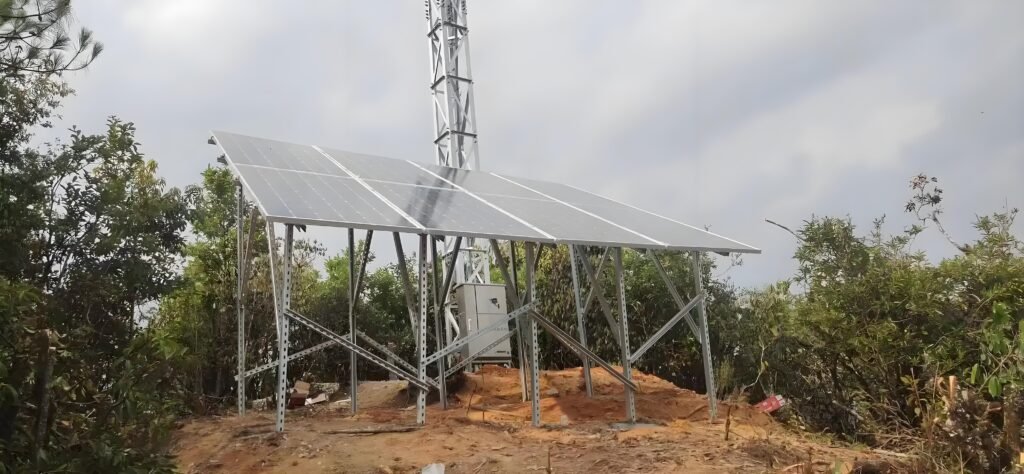
After installing your solar panels, wiring them correctly is crucial for ensuring your RV solar system operates efficiently. There are three primary methods for connecting solar panels: parallel, series, and a combination of both. Each method has its advantages and disadvantages, suited to different applications and needs. Below, we will delve into each connection method, discussing their workings, pros, cons, and best practices.
1. Parallel Connection of Solar Panels
A parallel connection involves connecting each solar panel's positive and negative terminals directly to the charge controller. The main characteristics and advantages of this configuration include:
- Independent Operation: Parallel connections allow each solar panel to operate independently. If one panel is shaded or malfunctions, the others can continue to generate power at full capacity. This redundancy greatly enhances the system's stability, especially in partially shaded conditions.
- Increased Current: In a parallel configuration, the total current output doubles while the voltage remains constant. This feature is beneficial for applications that require rapid charging, particularly when using multiple solar panels.
- Cable Specifications: Due to the increase in total current, you will need to select cables that can handle a higher amperage. Therefore, it's advisable not to connect more than 500 watts of solar panels in parallel to avoid excessively thick and costly wiring.
- Ideal Scenarios: Parallel connections are suitable for applications where space is limited or voltage requirements are not critical, such as small RVs or mobile power systems.
2. Series Connection of Solar Panels
A series connection involves linking the positive terminal of one solar panel to the negative terminal of another, effectively creating a larger panel array. This configuration presents several features and challenges:
- Output Limitation: The primary drawback of a series configuration is that the overall output is constrained by the lowest-performing panel. For example, if one panel is shaded, the output of all connected panels will be reduced, leading to instability in power supply.
- Voltage Increase: Series connections can double the voltage while maintaining a constant current. This voltage boost is particularly important for applications requiring high voltage, such as large inverters.
- Reduced Cable Costs: Since the current in a series connection is lower, you can use smaller gauge cables, which can reduce material costs.
- Charge Controller Requirements: Note that series configurations place higher voltage demands on the charge controller, potentially requiring a more expensive unit.
- Ideal Scenarios: This setup is suitable for systems with high voltage requirements, such as large RVs or fixed solar power installations.
3. Hybrid Connection Method
The hybrid connection method involves using both series and parallel configurations, grouping solar panels together before connecting them to the charge controller. This method combines the advantages of both approaches and has the following characteristics:
- Flexibility and Adaptability: Hybrid connections can be tailored to meet specific current and voltage output requirements, making them suitable for varying load conditions. This is particularly useful for RVs that operate multiple electrical devices.
- Redundancy: Even if one group of panels fails, other groups can still provide power, ensuring overall system stability.
- Complexity: While hybrid connections offer significant flexibility, they also involve more complex wiring and configuration. This approach is best suited for experienced users who can plan and implement the system effectively.
- Ideal Scenarios: This method is particularly well-suited for large RVs, outdoor adventures, or systems requiring high efficiency in solar energy use.
Choosing the right solar panel connection method is vital for maximizing overall system efficiency and reliability. Whether you opt for a parallel, series, or hybrid configuration, it's essential to consider your specific application, budget, and system requirements. By employing a well-planned connection strategy, you can more effectively harness solar energy, providing a sustainable and reliable power source for your RV adventures.
Choosing the Best Flexible Solar Panels for RVs
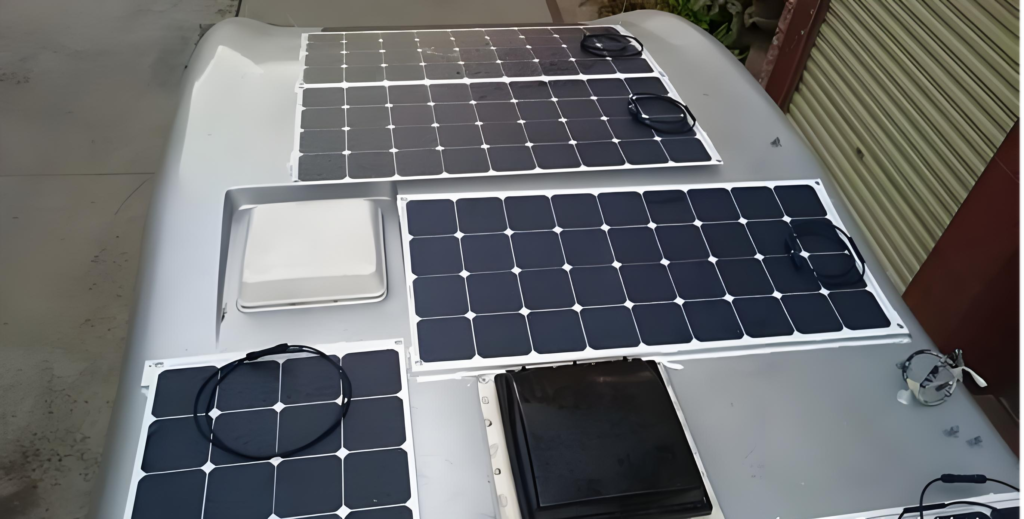
When selecting the right flexible solar panels for your RV roof, several factors must be considered. Flexible solar panels are particularly suited for campers and travelers due to their compact size and lightweight design. Their flexibility allows them to conform to the curves of an RV's roof, minimizing the need for flat surface area.
Advantages of Choosing Flexible Solar Panels
Flexible solar panels offer numerous benefits, especially for RV applications:
- Optimized Space Utilization: The design allows flexible panels to better fit the curvature of the RV roof, enabling the installation of more panels in limited space.
- Lightweight Design: Compared to traditional rigid solar panels, flexible panels are significantly lighter, often weighing only a few pounds. This ease of handling reduces the load on the roof structure, making them ideal for RVs.
- Easy Installation: Flexible solar panels typically come with pre-drilled holes, allowing them to be hung from hooks or securely adhered to the roof using specialized adhesives, eliminating the need for drilling and additional supports.
- Strong Weather Resistance: The high-protection tempered glass and laminated coating effectively withstand harsh weather conditions, such as heavy rain and strong winds, ensuring long-term stability.
Recommended Product: Sungold 100W Flexible Solar Panel
The Sungold 100W Flexible Solar Panel is a highly regarded choice in the market, particularly for campers with limited installation space. Key features include:
- Durable Design: Constructed with high-strength materials, it can endure various harsh climates, extending its lifespan.
- Universal Compatibility: Equipped with a protective shell and solar cable, it easily connects to any third-party solar system, making it suitable for charging portable power stations or 48V power systems.
- Flexible Installation Options: With its design, the Sungold panel can adapt to the unique shape of the RV, maximizing the use of available space.
Installation Considerations
When installing flexible solar panels, consider the following steps:
- Clean the Roof Surface: Ensure the installation area is clean and dry to allow effective adhesion of the adhesive.
- Mark the Position Accurately: Use tape to mark the position of the solar panels before installation, ensuring they won't be obstructed by other equipment (like antennas or vents).
- Regular Maintenance: Periodically check the condition of the solar panels to ensure that dust or dirt does not affect performance.
In conclusion, choosing the right flexible solar panels can significantly enhance the energy efficiency of your RV, enabling campers to enjoy extended periods of self-sufficiency. By understanding the characteristics and installation requirements of different products, you can select the highest quality solar panels for your RV, meeting all your travel needs.

